|
1) The skeleton that makes “Bones” is actually ~65lbs, quite heavy... He comes in 5 parts, you must attach his arms and legs. I recommend tightening all screws, as he is 4th quality, and on mine some of them were loose.
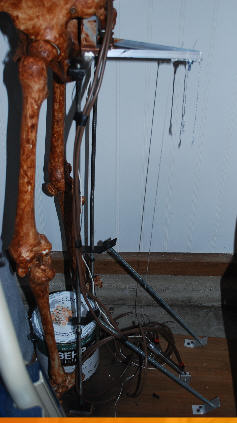
2) Make him a stand. (see last picture). ‘Budget Bucky’ comes with a metal spine holding him together. I took a piece of Aluminum barstock and tapped the end to replace the nut below his pelvis... This allowed me to extend the spine about 4” so I could then attach an 8” piece of aluminum bar stock behind his hips. I tapped this barstock to allow 2 - 3/8” threaded rods to hold him up (attached at base)... These are mostly hidden behind his dangling legs. These threaded rods act like springs and he is able to freely ‘wobble’ around on them. I decided to reinforce them with additional threaded rod at an angle (see last picture).
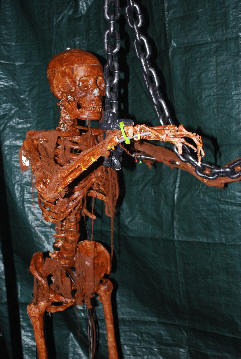
3) Animate his arms. I added 4” dual acting pneumatics to each arm/ I drilled through the center of the arm, and then made a bracket on his shoulder blade ro allow the cylinder to freely move as it extended. I ended up only providing air to the one input (to raise the arms) as the weight of the arm reset the cylinder well, and I didn’t need to power it down.
4) Make him lurch. I added some angle stock off the pelvis bar and connected a nylon string to another dual acting cylinder connected to the base. This starts contracted, with the line taut, holding Bones upright, pulled back. When extended, the nylon string is released, and the spring from the threaded rod make ‘Bones’ lurch forward. When the cylinder is contracted again, it resets him for the next guest.
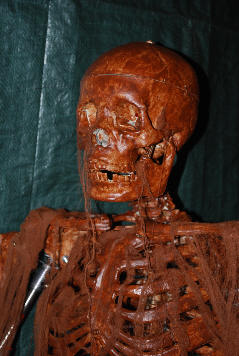
5) Optional: Open his cranium and drill holes through his eye sockets. I inserted 2 red LEDs that can light up (I use 5V, so added a 270 ohm resistor to limit the current.
6) Stain him with a dark gel stain, and add some cheesecloth to add an extra effect. The stain will take several days to fully dry on this material, so do it outside in the garage, as it smells for some time.
7) Animate him. I hook ‘Bones’ up to my computer control. He uses 4 control lines... One each for the 3 pneumatic solenoids controling the cylinders, and one which directly powers the LED eyes. By experimenting, I found that raising his arms as I released his hips provided the best lurch, but I made it look like he was trying to grab the guest by alternately lowering and re-raising the arms.
|