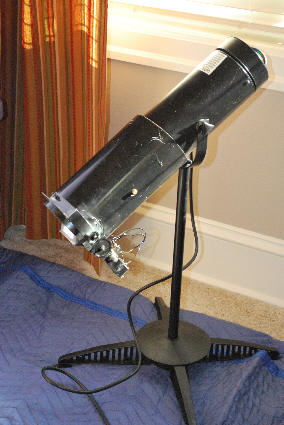
Home - Sitemap

The Ghost Projector

Holiday projector (usually sold at Christmas time)

1‘ of 6“ PVC Tubing

2 small mirrors, ~1.5“x1.5”

Small, low RPM Motor

Power Supply, and Motor Speed Control

Misc bracket materials

Transparency material, with ghost image

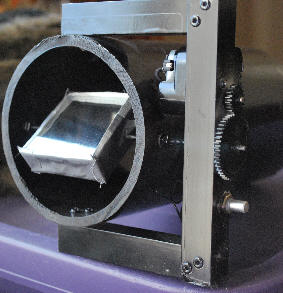
1) Ensure that the PVC you got fits around the Projector. Drill holes in either side to allow the projector screws (which hold in the transparency) to perform double duty, and also hold on the rotating mirror extension.

2) Rig up bracket materials to hold the motor, any necessary gears and the rotating mirror assembly onto the projector. Be sure that the motor rotates the mirror properly, the mirrors should reflect down, and as rotating bring the image up... thus the projected ghost will appear to be rising from the ground.

3) Attach the 2 mirrors, back ot back on a small piece of wood, which is attached to the motor for rotation.

4) Paint the extension black (tape off the mirrors)

5) Create a screen to project against. I sewed a pocket into either side of a thin, narrow piece of black fabric, and threaded PVC tubing through it. I pounded the PVC into the ground on one end, and connected the other to keep the fabric taut.

A ghost image (the clear part of the transparency) is projected against a rotating mirror which causes the image to appear to be coming from the ground and rising through the air. It is projected against a black fabric.

While a worthwhile addition to a haunt, it was more ‘show’ than ‘scare’ and failed to really impress the little goblins.